I made a salad over the weekend, and I wish I had taken a picture of it. It was a salad I tried recreating from a restaurant I went to recently, but I didn't have all the ingredients. So I tried to recreate the earthiness of it.
Here's what I used:
Spring greens
Grape tomatoes
Shaved carrots
Cucumbers
Craisins
Pumpkin Seeds
Goat Cheese
Ken's Olive Oil & Vinaigrette dressing
I made enough salad for about 30 guests, and I even have plenty of leftovers so I can enjoy more yummy salad the rest of this week. I didn't make the greens as the star ingredient either. Rather, every component was equally used, no favoritism's here! If I had some extra time I would have enjoy adding hard boiled egg to the mix, but the salad still felt hearty as a side dish.
I've thought about making this mix again and wrapping it in a tortilla. Maybe adding some more protein to make it more filling. What do you think?
Showing posts with label Kitchen nightmares. Show all posts
Showing posts with label Kitchen nightmares. Show all posts
Tuesday, November 16, 2010
Friday, November 5, 2010
Comfort Food
I'm not the typical wife. I don't necessarily cook, clean, sew, or do laundry regularly. I am not the sort of person who is regimented on a schedule. I loathe routines, for myself that is. I do my best, try to pick up as I go, and make sure everyone is clean, loved, and happy. I'm a procrastinator at it's finest. I don't think I've every talked about my procrastination issues. Maybe someday I'll post something about that. I'll try not to procrastinate. =)
I came across a recipe the other day and it was one that I fell in love with. As soon as I tasted it, I knew I would be making it again. I don't find too many recipes where I feel this way, so I felt compelled to share it in this post. Here goes...
Butternut Squash Risotto. I've never attempted risotto before, never mind how I even learned how to handle a butternut squash. I opted for fresh because they were on sale at 79 cents a pound. So I bought one that was just under two pounds. I will copy the recipe I followed here, but please note I did make some alterations, however the alterations were strictly because I just didn't have enough ingredients.
I came across a recipe the other day and it was one that I fell in love with. As soon as I tasted it, I knew I would be making it again. I don't find too many recipes where I feel this way, so I felt compelled to share it in this post. Here goes...
Butternut Squash Risotto. I've never attempted risotto before, never mind how I even learned how to handle a butternut squash. I opted for fresh because they were on sale at 79 cents a pound. So I bought one that was just under two pounds. I will copy the recipe I followed here, but please note I did make some alterations, however the alterations were strictly because I just didn't have enough ingredients.
Ingredients:
- 7 Tbs. unsalted butter
- 2 Tbs. minced fresh sage
- 6 cups vegetable or chicken stock (Used 4 cups, I didn't have enough)
- 2 cups butternut squash puree
- 2 Tbs. olive oil
- 2/3 cup caramelized onions (Used 1 large onion)
- 2 cups Arborio rice
- 1 tsp. minced fresh rosemary
- 1/2 cup dry white wine
- 1/2 cup grated Parmigiano-Reggiano cheese (Used a little less as I ran out)
- Salt and freshly ground pepper, to taste
Directions:
In a small saucepan over medium heat, melt 4 Tbs. of the butter. Add 1 Tbs. of the sage and heat until the butter browns. Strain the butter into a small bowl and discard the sage. Cover the bowl to keep the butter warm.
In a large saucepan over medium-high heat, whisk together the stock and squash puree. Bring just to a simmer, 8 to 10 minutes; maintain over low heat.
In a large saucepan or risotto pan over medium heat, warm the olive oil. Add the caramelized onions and rice and stir until the grains are well coated with the oil and are nearly translucent with a white dot in the center, about 3 minutes. Stir in the remaining 1 Tbs. sage and the rosemary. Add the wine and stir until it is absorbed.
Add the simmering stock mixture a ladleful at a time, stirring frequently after each addition. Wait until the stock is almost completely absorbed before adding more.
When the rice is tender to the bite but slightly firm in the center and looks creamy, after about 30 minutes, stir in the remaining 3 Tbs. butter, the cheese, salt and pepper. Add more stock if needed so the rice is thick and creamy. Let stand for 2 minutes. Drizzle with the reserved sage butter and serve immediately. Serves 6.
In a large saucepan over medium-high heat, whisk together the stock and squash puree. Bring just to a simmer, 8 to 10 minutes; maintain over low heat.
In a large saucepan or risotto pan over medium heat, warm the olive oil. Add the caramelized onions and rice and stir until the grains are well coated with the oil and are nearly translucent with a white dot in the center, about 3 minutes. Stir in the remaining 1 Tbs. sage and the rosemary. Add the wine and stir until it is absorbed.
Add the simmering stock mixture a ladleful at a time, stirring frequently after each addition. Wait until the stock is almost completely absorbed before adding more.
When the rice is tender to the bite but slightly firm in the center and looks creamy, after about 30 minutes, stir in the remaining 3 Tbs. butter, the cheese, salt and pepper. Add more stock if needed so the rice is thick and creamy. Let stand for 2 minutes. Drizzle with the reserved sage butter and serve immediately. Serves 6.
I wish I took a picture of the finished dish. To be honest, it didn't look all that pretty, but looks were deceiving, and it was delicious! I've been eating it for 3 days and I still have way too much! I would definitely cut this recipe in half next time, or make this the way it is for a holiday party. Wholesome, comfort food is what this is for me. I would even try substituting the butternut squash for pumpkin and maybe add some nutmeg or all spice seasoning.
Have you attempted a dish you wouldn't dream yourself making? Did you surprise yourself like I did?
Wednesday, April 21, 2010
Homemade Finger Paint
My 17 month old son has loved coloring since he was 12 months. We introduced crayons to him very early and it's been something we do together as a family quite frequently. He calls it: cah-cah because he can't quite say cah-lah. We live in New England and the R's are removed from most words so I doubt he'll be pronouncing those for a while.
We cah-cah a lot. Almost too much. I think he enjoys holding the crayons and inspecting them more than he does seeing the color on the paper. But there are days when he surprises me and he is starting to understand the actual activity of coloring.
Since his perception of coloring has evolved over the past few weeks, I thought I'd give finger painting a try. J still likes to put anything and everything into his mouth so I opted to make my own finger paint. At least if he swallows a finger full of finger paint, it's only full of corn starch. I'm not very crafty but the recipe seemed easy.
Boil 3 cups of water
Add 1 cup of corn starch
Stir food coloring as desired
So that's what I did, boil and mix. But my mixing became clumpy. Did I mix too quickly?

So I thought, maybe if I add food coloring it would get better?


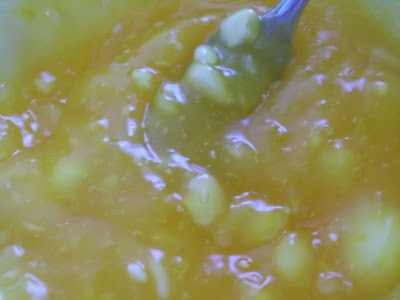
No matter how much I stirred, smashed, mixed, crushed those little corn starch crumbs, they wouldn't break up into the smooth texture I was expecting.
But did this matter to the expert? Unfortunately I haven't tested the waters with J yet, but hope to later this week.
We cah-cah a lot. Almost too much. I think he enjoys holding the crayons and inspecting them more than he does seeing the color on the paper. But there are days when he surprises me and he is starting to understand the actual activity of coloring.
Since his perception of coloring has evolved over the past few weeks, I thought I'd give finger painting a try. J still likes to put anything and everything into his mouth so I opted to make my own finger paint. At least if he swallows a finger full of finger paint, it's only full of corn starch. I'm not very crafty but the recipe seemed easy.
Boil 3 cups of water
Add 1 cup of corn starch
Stir food coloring as desired
So that's what I did, boil and mix. But my mixing became clumpy. Did I mix too quickly?

So I thought, maybe if I add food coloring it would get better?


No matter how much I stirred, smashed, mixed, crushed those little corn starch crumbs, they wouldn't break up into the smooth texture I was expecting.
But did this matter to the expert? Unfortunately I haven't tested the waters with J yet, but hope to later this week.
Tuesday, March 30, 2010
Baking gone sour
Did you ever get really excited about trying a new recipe? Something from scratch? I'm sure I'm not the only one here. It happened to me last night.
I had a recipe for biscuits and was really excited to try them out last night since the baking time was 10 minutes. I hadn't thought much about dinner but so far, I knew we'd have fresh, fluffy, homemade biscuits!
When I search for recipes online, I like to write the ones I like down so I can save it in my own handwriting (instead of printing it out). It makes me feel like it's more authentic that way, even though I just copied it from some website. But this way, it makes me feel like I can tweek it if I want to and make it my own.
There was a small problem last night because of my handwritten recipe. Instead of writing baking powder, I wrote baking soda. Well, you can only imagine how things turned out: sour!
I made 12 biscuits. And they were so gross I couldn't even look at them and unfortunately I left them on the baking sheet on top of my stove overnight. There they were this morning staring back at me. I had thought about taking a picture to share here, but why. Why would I do that to you.
They really smelled good baking too. My husband came out and was wondering what was baking with that amazing smell. We both ate a biscuit but the tang and bitterness of the baking soda ruined the whole batch. But I am determined to create this batch again using the proper ingredients and share the results with my family. It just has to be different the second time around!
I had a recipe for biscuits and was really excited to try them out last night since the baking time was 10 minutes. I hadn't thought much about dinner but so far, I knew we'd have fresh, fluffy, homemade biscuits!
When I search for recipes online, I like to write the ones I like down so I can save it in my own handwriting (instead of printing it out). It makes me feel like it's more authentic that way, even though I just copied it from some website. But this way, it makes me feel like I can tweek it if I want to and make it my own.
There was a small problem last night because of my handwritten recipe. Instead of writing baking powder, I wrote baking soda. Well, you can only imagine how things turned out: sour!
I made 12 biscuits. And they were so gross I couldn't even look at them and unfortunately I left them on the baking sheet on top of my stove overnight. There they were this morning staring back at me. I had thought about taking a picture to share here, but why. Why would I do that to you.
They really smelled good baking too. My husband came out and was wondering what was baking with that amazing smell. We both ate a biscuit but the tang and bitterness of the baking soda ruined the whole batch. But I am determined to create this batch again using the proper ingredients and share the results with my family. It just has to be different the second time around!
Subscribe to:
Posts (Atom)
LinkWithin
